A step-by-step guide with essential visual tips to ensure accurate measurement of a DX Evaporator coil for seamless installation. Recently, we discussed how to precisely measure a DX Evaporator Coil for pricing purposes. Assuming you’ve successfully quoted the replacement coil and secured the job, congratulations! Now comes the crucial phase of ensuring a flawless fit and hassle-free installation. When it comes to installing a new coil, several factors play a significant role, such as the casing depth, headers, distributor locations, and return connection placements. These elements require careful attention to guarantee compatibility and ease of installation. First and foremost, focus on the casing depth. This measurement is vital since the coil's casing typically occupies the full depth of the coil section, making it critical that the new coil matches the existing setup. To measure the casing depth, start at the air intake side and extend your tape measure to the discharge side of the casing. This will give you the total depth from one end to the other. It’s also prudent to confirm the total internal depth available within the coil section. Having this information provides peace of mind, especially if the customer decides to adjust the system's capacity by increasing or decreasing the number of rows. Next, assess the casing height. Verify this measurement in two ways: first, by measuring from the top edge of the upper flange to the bottom edge of the lower flange; second, by adding the individual flange heights to the finned height. If something appears inconsistent, double-check that the flanges are standard stacking flanges, similar to the example provided earlier. Non-standard flanges, such as inverted or knife-edged types, might lead to confusion initially. If the flanges aren't standard, document the total height since this is most critical, and adjustments can be made later by shortening the flanges. Now move on to measuring the casing length. Record the distance from the edge of the vertical flange nearest to your supply and return connections to the edge of the opposing flange covering the coil's copper U-bends. Equally important is the OAL (Overall Length). You’ll need three measurements to confirm the OAL: 1. Measure the C dimension: the distance from the end of the fin pack to the end of the return header. 2. Measure the fin length: take this measurement near the top or bottom of the coil close to the flanges, not in the middle. Ensure your tape measure begins and ends inside the end flanges. 3. Add the fin length to the MAX dimension: that’s the end of the fin pack to the outside of the U-bend at the opposite end of the coil. The sum of these measurements represents the overall length of the coil, including headers (but not including the return connection, which may extend beyond the unit). As part of this process, measure the total available length of the unit to ensure your OAL fits appropriately and to identify any additional space available, if necessary. Regarding the circuiting, meticulous counting is essential. Document: Even if the coils are occasionally re-piped by the installing contractor, it’s advisable to maintain the original return connection and distributor locations. Record the distance from the bottom of the coil’s casing to the center of each connection point: Record the distance off the connections from either face of the coil: And finally, record the distance in or out from the end of the fin pack: For a dual-circuited DX coil, you can cross-check the connection locations by measuring the center-to-center distance between the two connections. Additionally, measure the diameter of the sweat return connection. Once all construction details are confirmed, the performance and design of the coil should align perfectly with the specifications required. In certain cases, adjustments may be made to the fins per inch, the number of feeds, or circuits to modify capacity without altering the fundamental construction. Ultimately, it’s about finding the optimal solution tailored to the customer’s needs. If this extensive measuring process seems overwhelming, don’t worry—Nationwide Coils specializes in providing precise coil measurements. Contact us, and we’ll handle everything seamlessly. Vertical Band Sealer,Vertical Bag Sealing Machine,Vertical Continuous Sealer,Vertical Sealer WENZHOU BROTHER MACHINERY CO., LTD. , https://www.chinabrother.netMeasuring DX Evaporator Coils for Perfect Fit: Insights from Chris Wright

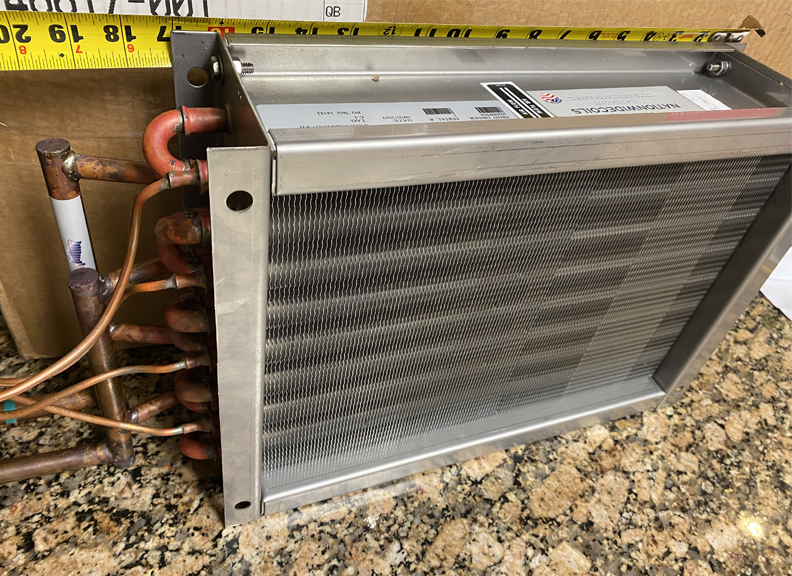
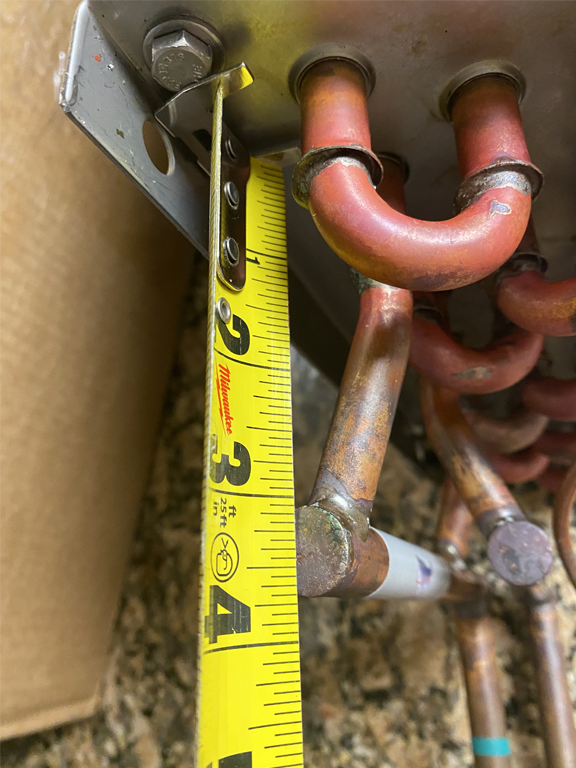
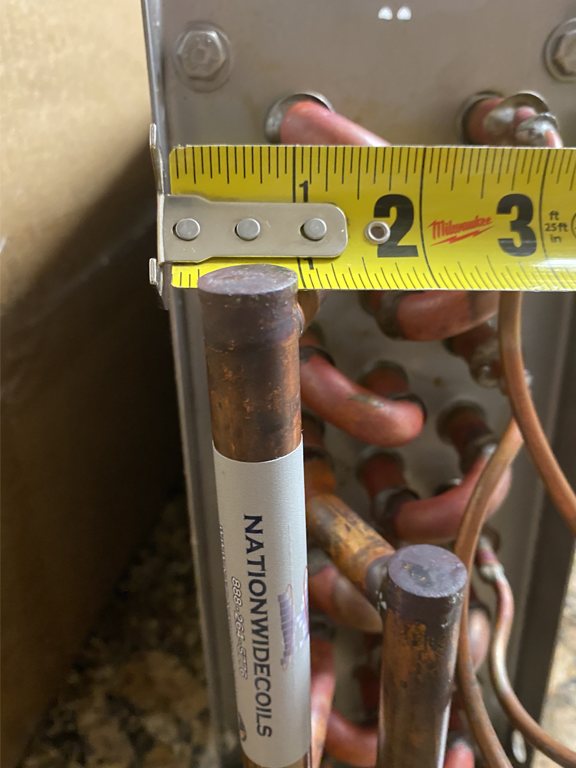
Measuring the casing depth
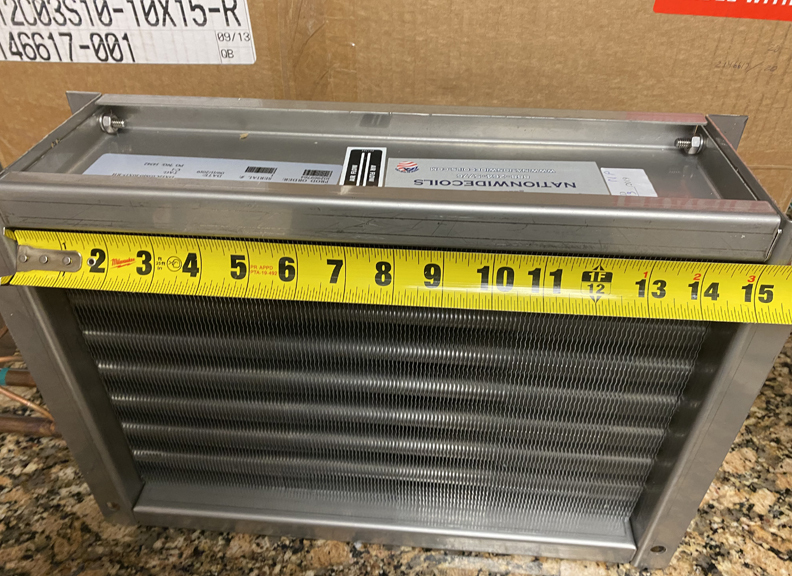
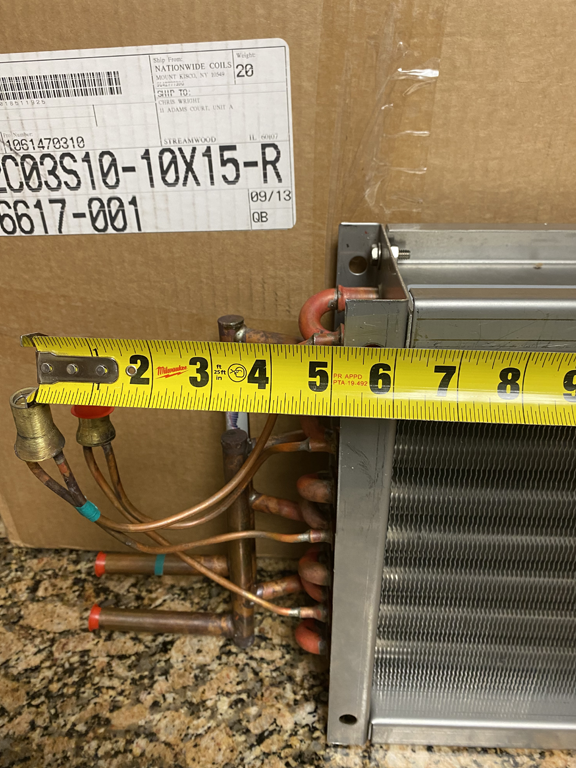
Measuring the casing length


Written by: Chris Wright
Nationwide Coils Account Manager, Chicago
Measuring DX Evaporator Coils For Fit: In the field with Chris Wright
USE OUR BLANK COIL DRAWINGS AS A GUIDE