Detailed step-by-step instructions, along with crucial visual tips, to guide you through accurately measuring a DX Evaporator coil for seamless installation. In a previous post, we covered how to precisely measure a DX Evaporator Coil for pricing purposes. Assuming you've already obtained the right price and secured the job, congratulations! Now it's time to take your skills to the next level and ensure a flawless installation. This phase involves paying close attention to specific measurements such as the casing depth, header placements, distributor locations, and return connection positions. These factors are essential for achieving the perfect fit and making the installation process as smooth as possible. The casing depth is particularly significant since the coil casing frequently uses the full depth of the coil section, and mounting typically doesn't allow for variations in casing depth. To measure this, take the distance from the outermost edge of the entering-air side to the outermost edge of the leaving-air side of the casing. It’s also wise to confirm the total depth space available within the coil section. Having this measurement provides reassurance and can be helpful if the client decides to adjust the system's capacity, allowing for more or fewer rows to be installed. Equally important is the casing height. I verify this in two ways—by stretching my tape measure from the top edge of the top flange to the bottom edge of the bottom flange and by summing the heights of both flanges with the finned height. If something seems off, double-check that the flanges are standard stacking flanges, as shown in the image above, and not inverted, knife-edged, semi-inverted, or any other type, as these could lead to confusion and uncertainty initially. If the flanges aren't standard, note the total height, as this is most crucial, and flanges can be trimmed if necessary. Next, measure the casing length, ensuring you record the distance from the edge of the vertical flange nearest to your supply and return connections to the edge of the opposite end's flange covering the coil’s copper U-bends. Equally vital is the OAL (Overall Length). There are three key measurements you’ll need to confirm your OAL. 1. Measure the C dimension: the distance from the end of the fin pack to the end of the return header. 2. Measure the fin length: do this near the flanges at the top or bottom of the coil, not in the middle. Your tape measure should start and end inside the end flanges. 3. Add the fin length to the MAX dimension: which is the distance from the end of the fin pack to the outside of the U-bend at the other end of the coil. The total of these measurements represents the overall length of the coil including headers (but not including your return connection, which can usually protrude from the unit). It’s also a good idea to measure the total available length of the unit to ensure your OAL fits appropriately and to assess any extra space available if needed. Regarding circuiting, it’s all about counting. Be sure to record: • The number of circuits • The number of feeds on each circuit • The number of capillary tubes on each circuit. While counting, also note the number of tubes you can count from top to bottom of one row. This can assist if you encounter any challenges verifying the finned height. Even though coils are sometimes re-piped by the installing contractor, always aim to retain your return connection and distributor locations as they are. Record the distance from the bottom of the coil’s casing to the center of each connection point: Record the distance off the connections off either face of the coil: And the record the distance in or out from the end of the fin pack: The connection locations on, say, a dual-circuited DX coil can be confirmed by taking the center-to-center distance of the two connections. Also measure the diameter of the sweat return connection. After verifying all construction details, the performance and construction of the coil should align perfectly with what is required. Sometimes, adjustments are made to fins per inch, the number of feeds, or circuits to manipulate capacity without altering the construction. At this point, it comes down to determining what best suits the customer's needs. If all this measuring seems overwhelming, that’s because it is! Reach out to us, and Nationwide Coils will handle these measurements for you with ease and precision. L-Bar Sealer,Bar Sealer,Automatic L Bar Sealer,L Bar Sealer Machine WENZHOU BROTHER MACHINERY CO., LTD. , https://www.chinabrother.netMeasuring DX Evaporator Coils for Perfect Fit: Insights from Chris Wright

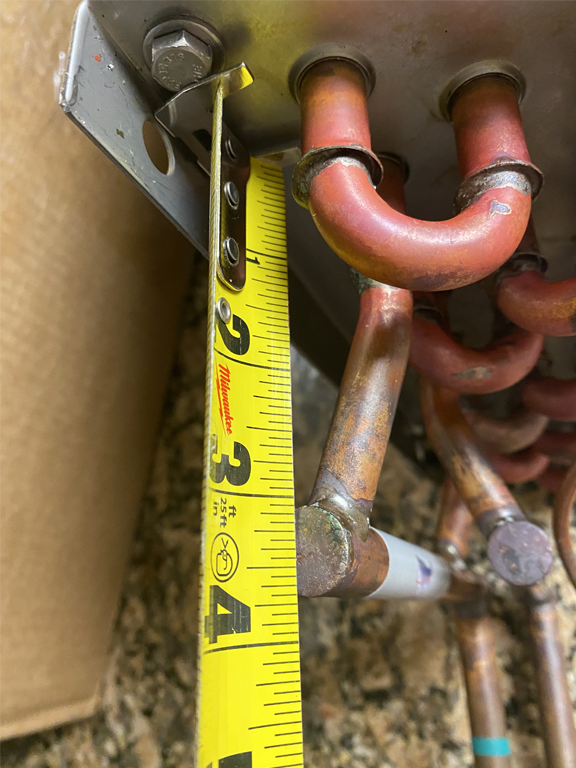
Measuring the casing depth
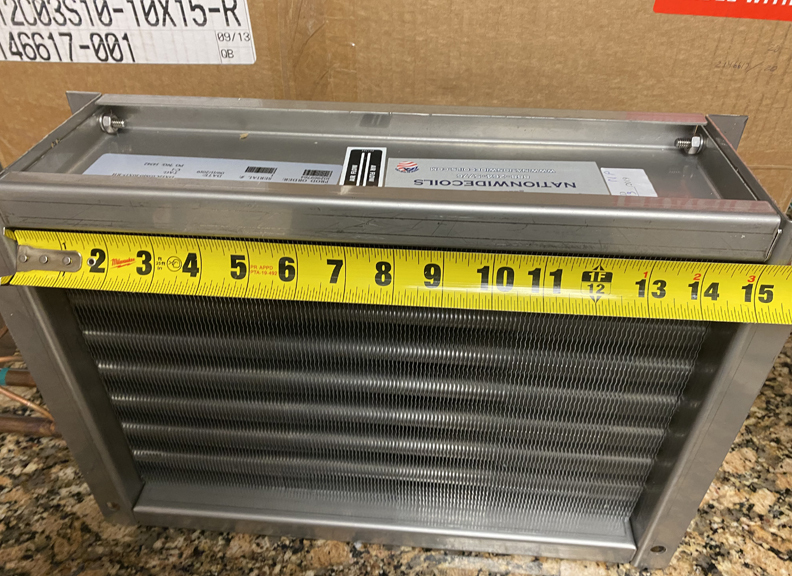
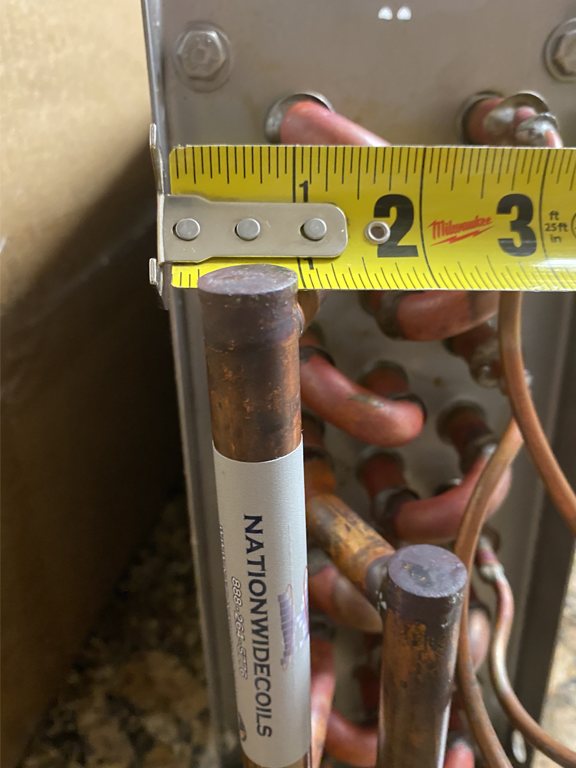
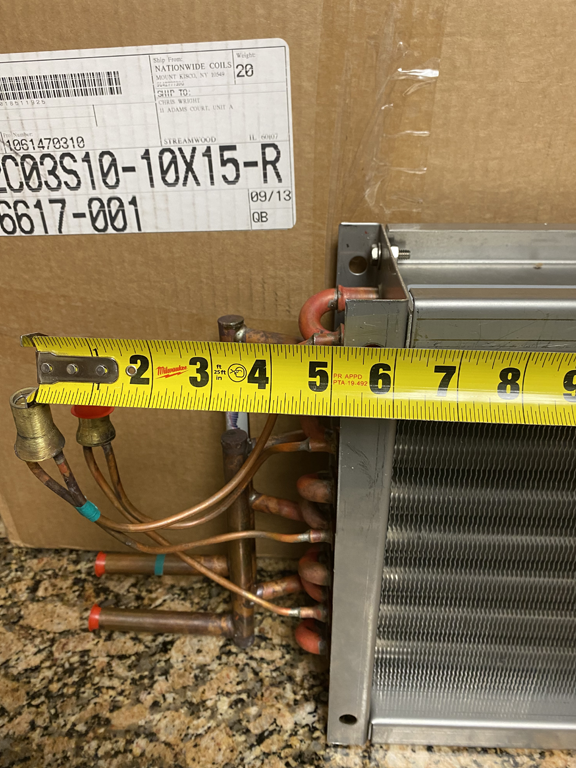
Measuring the casing length


Written by: Chris Wright
Nationwide Coils Account Manager, Chicago
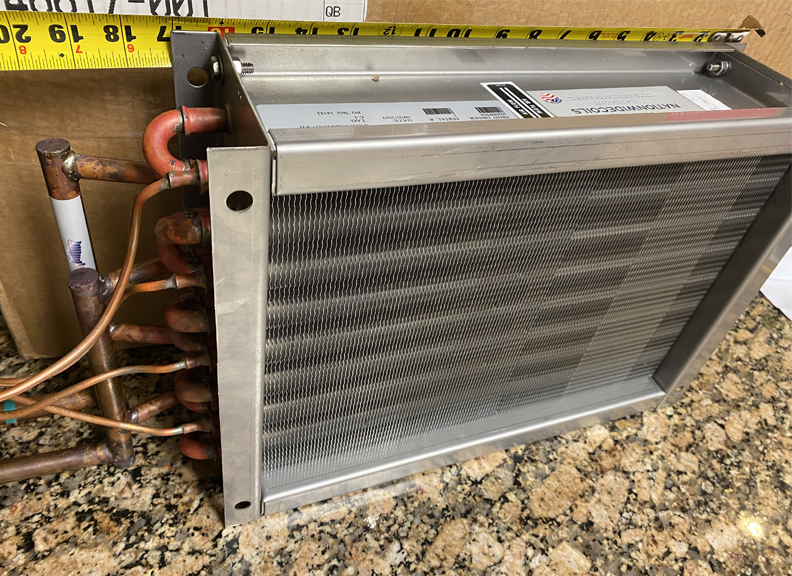
Measuring DX Evaporator Coils For Fit: In the field with Chris Wright
USE OUR BLANK COIL DRAWINGS AS A GUIDE